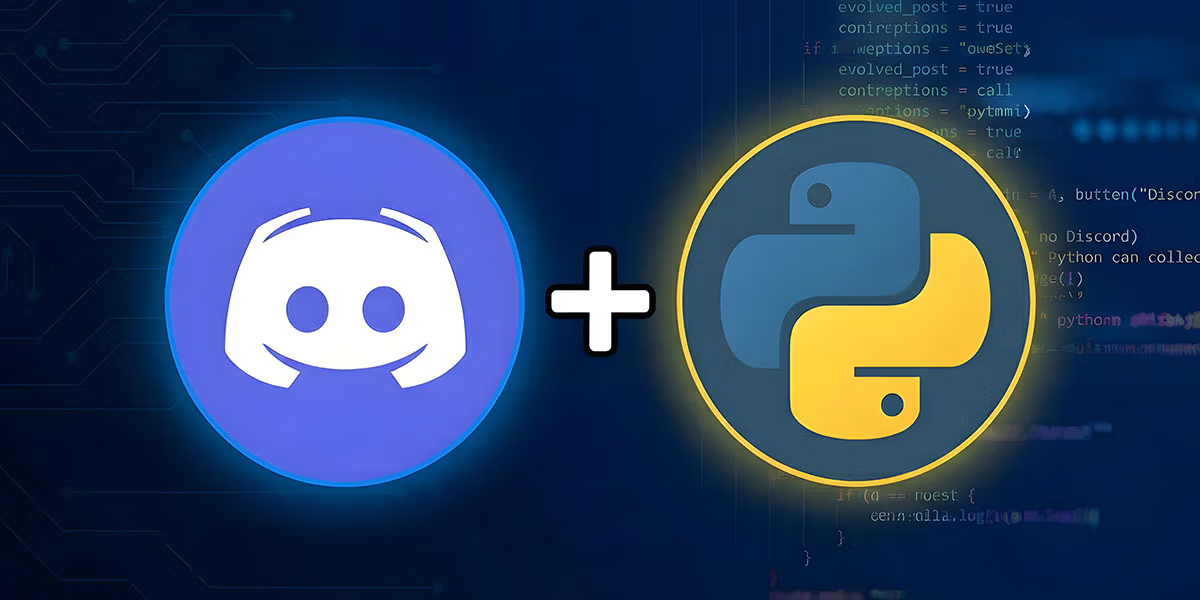
Building a Discord bot with Python is one of the most rewarding projects a developer can take on. It combines real programming skills with immediate, visible results inside a platform you and your community likely already use every day. In this complete guide, you will learn everything from the initial setup to advanced command features, working with events, formatting messages with embeds, and organizing your code for larger projects. Whether you are just starting out or already comfortable with Python basics, this tutorial walks you through each step clearly and practically.
What Is a Discord Bot?
A Discord bot is an automated program that connects to the platform and performs specific tasks. Bots function as special users that can respond to commands, react to server events, and interact with members in real time. They can send welcome messages to new users, play music in voice channels, moderate conversations by removing inappropriate content, run polls, manage roles, and much more.
The discord.py library is the most popular tool for building Discord bots with Python. It provides full access to the Discord API and lets you develop powerful bots without needing to deal with raw HTTP requests directly. Python is particularly well suited for this kind of project because of its clear and readable syntax. If you already know the basics of Python, building a working bot takes less than an hour. Even if you are learning Python from scratch, you can follow along without getting lost.
Prerequisites
Before writing any code, you need to prepare your development environment. Everything required is free and straightforward to set up.
Python Installed on Your Computer
You will need Python version 3.8 or higher. If you have never set up Python before, the guide on how to install Python libraries covers the full environment setup process, including pip configuration. To check if Python is already installed, open your terminal or command prompt and run:
python --versionIf you see something like “Python 3.10.0” or higher, you are ready to continue.
A Discord Account and a Test Server
You need a Discord account to access the developer portal and a server you own or manage for testing. You can create a free account at discord.com. Creating a private test server takes less than a minute and keeps your experiments separate from any real community you manage.
A Code Editor
A good editor makes development significantly more comfortable. Visual Studio Code is one of the most popular free options and works great for Python projects. You can also use PyCharm, which is a full-featured Python IDE, or even the IDLE editor that ships with Python itself.
Creating the Application in the Discord Developer Portal
The first practical step is creating an application in the Discord Developer Portal. This application generates the token your bot uses to authenticate and connect to Discord.
Step 1: Go to discord.com/developers/applications and log in with your Discord account.
Step 2: Click the “New Application” button in the top right corner. Give your application a name. This name can be different from what the bot will display later.
Step 3: In the left sidebar, click “Bot”, then click “Add Bot” and confirm with “Yes, do it!”.
Step 4: On the bot settings page, scroll to the “TOKEN” section. Click “Reset Token” and then “Copy” to save your token.
Important: Store this token somewhere safe and never share it publicly. Never paste it directly into code you plan to push to GitHub. Anyone with access to your token can control your bot completely.
Step 5: In the “Privileged Gateway Intents” section, enable “PRESENCE INTENT”, “SERVER MEMBERS INTENT”, and “MESSAGE CONTENT INTENT”. These permissions allow the bot to receive information about messages and server members.
Adding the Bot to Your Server
Step 1: In the Developer Portal, go to the “OAuth2” section in the sidebar and click “URL Generator”.
Step 2: Under “SCOPES”, check the “bot” option.
Step 3: Under “BOT PERMISSIONS”, select the permissions your bot will need. For testing, you can select “Administrator” to grant everything. In real projects, always choose only the specific permissions your bot actually requires.
Step 4: Copy the generated URL, open it in your browser, select your test server, and click “Authorize”. The bot now appears in your server’s member list but shows as offline because you have not run the code yet.
Installing discord.py
With your environment ready, install the discord.py library using pip:
pip install discord.pyOn Linux or macOS, you may need to use pip3 instead. The package manager will download the library along with all required dependencies. Before installing, it is good practice to set up a dedicated Python virtual environment for the project. This keeps your bot’s dependencies isolated and prevents conflicts with other Python projects on the same machine.
Writing Your First Bot
Create a file called bot.py in your code editor and add the following:
import discord
from discord.ext import commands

# Replace with your actual token
TOKEN = 'your_token_here'

# Set the command prefix
bot = commands.Bot(command_prefix='!', intents=discord.Intents.all())

@bot.event
async def on_ready():
    print(f'{bot.user} is online!')

@bot.command()
async def hello(ctx):
    await ctx.send(f'Hello, {ctx.author.name}!')

bot.run(TOKEN)Here is what each part does. The first two lines import the discord library and the commands module, which simplifies command creation. The TOKEN variable holds your bot’s token. The commands.Bot instance sets the prefix to ! and specifies which events the bot can receive through the intents parameter. The on_ready event fires when the bot connects successfully. The hello command responds with a greeting when a user types !hello.
Save the file and run it in your terminal:
python bot.pyIf everything is correct, you will see your bot’s name followed by “is online!” in the terminal. Go to your Discord server and type !hello in any channel. The bot should respond with a personalized greeting.
Protecting Your Token with Environment Variables
Never leave your token directly in the source code. If you share the code or push it to GitHub, anyone can read the token and take control of your bot. The correct approach is to use a .env file to store sensitive information. First, install the python-dotenv library:
pip install python-dotenvCreate a file called .env in the same folder as your bot:
DISCORD_TOKEN=your_token_hereThen update your bot code to load the token from the file:
import discord
from discord.ext import commands
import os
from dotenv import load_dotenv

load_dotenv()
TOKEN = os.getenv('DISCORD_TOKEN')

bot = commands.Bot(command_prefix='!', intents=discord.Intents.all())

@bot.event
async def on_ready():
    print(f'{bot.user} is online!')

@bot.command()
async def hello(ctx):
    await ctx.send(f'Hello, {ctx.author.name}!')

bot.run(TOKEN)Remember to add .env to your .gitignore file if you use Git. For a deeper look at working with environment variables in Python, the article on reading environment variables in Python covers the topic in detail.
Creating Custom Commands
Commands are the most common way users interact with bots. Here are a few examples that illustrate different patterns you will use regularly.
Command with Arguments
A command can receive input from the user. This example creates a command that echoes back whatever the user types:
@bot.command()
async def repeat(ctx, *, message):
await ctx.send(message)The * before message captures everything after the command as a single string. Usage: !repeat Hello world!
Command with Calculations
@bot.command()
async def add(ctx, num1: int, num2: int):
    result = num1 + num2
await ctx.send(f'The sum of {num1} + {num2} is {result}')The type annotation after the colon tells discord.py to convert the input automatically. If the user passes something that is not a number, the library raises an error that you can handle gracefully.
Command with Server Information
@bot.command()
async def info(ctx):
    server = ctx.guild
    message = f"""
    **Server Name:** {server.name}
    **Members:** {server.member_count}
    **Created on:** {server.created_at.strftime("%m/%d/%Y")}
    """
await ctx.send(message)Working with Events
Beyond commands, bots can react to events that happen in the server. Events are actions such as a new member joining, someone sending a message, or a reaction being added to a post.
Welcome Message
@bot.event
async def on_member_join(member):
    channel = member.guild.system_channel
    if channel:
        message = f'Welcome to the server, {member.mention}! Glad to have you here.'
await channel.send(message)Keyword Detection
The bot can respond to specific words without requiring a command prefix:
@bot.event
async def on_message(message):
    # Ignore messages from the bot itself
    if message.author == bot.user:
        return

    # Respond when someone mentions Python
    if 'python' in message.content.lower():
        await message.channel.send('You mentioned Python! Great choice. ')

    # Important: always process commands when using on_message
await bot.process_commands(message)The last line is critical. Without await bot.process_commands(message), none of your regular commands will work when on_message is defined.
Formatting Messages with Embeds
Embed messages are those organized, colored boxes that many bots use to make their responses look polished and professional. Here is how to create a basic embed:
@bot.command()
async def about(ctx):
    embed = discord.Embed(
        title='About This Bot',
        description='A bot built to help the community!',
        color=discord.Color.blue()
    )

    embed.add_field(name='Language', value='Python', inline=True)
    embed.add_field(name='Library', value='discord.py', inline=True)
    embed.set_footer(text='Built in 2025')
    embed.set_thumbnail(url=bot.user.avatar.url)

await ctx.send(embed=embed)Embeds support fields, images, thumbnails, footers, and custom colors. The inline=True parameter places fields side by side.
Error Handling
When a user calls a command incorrectly, showing a clear error message is important for usability. The discord.py library lets you catch specific error types per command:
@add.error
async def add_error(ctx, error):
    if isinstance(error, commands.MissingRequiredArgument):
        await ctx.send('Please provide two numbers. Example: !add 5 3')
    elif isinstance(error, commands.BadArgument):
await ctx.send('Numbers only, please. Example: !add 5 3')MissingRequiredArgument fires when the user skips a required input. BadArgument fires when the input has the wrong type. For a broader look at error handling in Python, the article on try and except in Python covers the concepts that apply here.
Saving Persistent Data with JSON
Many bots need to remember information even after being restarted. A simple way to achieve this is by saving data to a JSON file:
import json

@bot.command()
async def save(ctx, *, text):
    data = {}

    try:
        with open('data.json', 'r') as file:
            data = json.load(file)
    except FileNotFoundError:
        pass

    data[str(ctx.author.id)] = text

    with open('data.json', 'w') as file:
        json.dump(data, file)

    await ctx.send('Data saved successfully!')

@bot.command()
async def retrieve(ctx):
    try:
        with open('data.json', 'r') as file:
            data = json.load(file)
            text = data.get(str(ctx.author.id))

            if text:
                await ctx.send(f'Your saved data: {text}')
            else:
                await ctx.send('You have no saved data.')
    except FileNotFoundError:
await ctx.send('No data has been saved yet.')This setup lets each user save and retrieve their own information. For larger projects, consider using a proper database like SQLite or PostgreSQL instead of flat files.
Adding Reactions and Interactive Polls
@bot.command()
async def poll(ctx, *, question):
    message = await ctx.send(f'📊 **Poll:** {question}')
    await message.add_reaction('👍')
    await message.add_reaction('👎')

    def check(reaction, user):
        return user == ctx.author and str(reaction.emoji) in ['👍', '👎']

    try:
        reaction, user = await bot.wait_for('reaction_add', timeout=30.0, check=check)
        await ctx.send(f'{user.name} voted {reaction.emoji}')
    except:
await ctx.send('Poll timed out!')The wait_for method pauses execution until a specific event occurs. The timeout parameter defines how long to wait before giving up.
Organizing Your Code with Cogs
As your bot grows and accumulates more commands, putting everything in a single file becomes hard to manage. Cogs are extensions that group related commands into separate files, making the project much easier to maintain.
Create a file called general_commands.py:
from discord.ext import commands

class GeneralCommands(commands.Cog):
    def __init__(self, bot):
        self.bot = bot

    @commands.command()
    async def ping(self, ctx):
        await ctx.send('Pong!')

    @commands.command()
    async def test(self, ctx):
        await ctx.send('Test command is working!')

async def setup(bot):
await bot.add_cog(GeneralCommands(bot))In your main bot file, load the Cog like this:
import discord
from discord.ext import commands
import asyncio

bot = commands.Bot(command_prefix='!', intents=discord.Intents.all())

async def load_extensions():
    await bot.load_extension('general_commands')

async def main():
    async with bot:
        await load_extensions()
        await bot.start(TOKEN)

asyncio.run(main())This structure scales well. You can create separate Cog files for moderation commands, economy systems, music features, and anything else, keeping each concern cleanly separated. Understanding how to use the Python os module can also help when your Cog files need to load configuration or access the file system dynamically.
Hosting Your Bot in the Cloud
For your bot to stay online around the clock, you need to host it on a server. Several options exist across different price points. Replit provides a free browser-based environment that is excellent for learning and quick experiments, though it has execution time limits. Heroku offers a limited free tier that works for simple bots and requires basic knowledge of Git and deployment. For professional projects, a VPS from providers like DigitalOcean or a cloud instance on AWS gives you full control and guaranteed uptime, but requires some familiarity with Linux server administration.
Best Practices and Security
Following good practices from the start keeps your bot safe, stable, and maintainable as it grows.
- Never expose your token. Use environment variables and add your
.envfile to.gitignorebefore any commit. - Validate all user input. Always verify that data provided by users is in the expected format before processing it.
- Handle errors properly. Unhandled exceptions can crash your bot. Wrap critical sections in try/except blocks.
- Use logging. Record important events so you can diagnose problems when the bot misbehaves.
- Respect rate limits. The Discord API limits how many requests you can send per second. Avoid sending large bursts of messages.
- Read the Discord guidelines. The Discord Developer Policy and Terms of Service set the rules for what bots are allowed to do. Violating them can result in your bot being banned.
Writing clean, readable code also matters as the project grows. Following the PEP 8 style guide, which you can explore through the article on PEP8 in Python, makes your bot code easier to review, maintain, and share with others.
Advanced Features to Explore Next
Once you have mastered the basics, many more capabilities are within reach. Integration with external APIs lets you fetch live data such as weather forecasts, currency rates, or news headlines using the Python Requests library. You can build XP and leveling systems that gamify participation, automatic moderation that detects and removes spam or offensive content, virtual economy systems where members earn and spend server currency, and music playback that lets the bot join voice channels and stream audio.
For projects that require processing large amounts of structured data, such as server statistics or leaderboard tracking, knowing Pandas can be very useful alongside your bot development.
Debugging and Troubleshooting
When something does not work as expected, a systematic approach to investigation is your best tool. Use print() statements to trace the flow of your code. Enable the built-in logging system that discord.py provides:
import logging

logging.basicConfig(level=logging.INFO)
logger = logging.getLogger('discord')Always read error messages carefully. They tell you exactly where in the code the problem occurred and why. Check permissions frequently, since many issues stem from the bot lacking the rights to perform a specific action in a channel or server. Consult the official discord.py documentation, which is thorough and packed with practical examples for every feature covered in this guide.
Frequently Asked Questions
Do I need advanced Python knowledge to build a Discord bot?
No. Basic Python knowledge is enough to build simple bots. You will naturally pick up more advanced concepts as you add new features and work through real problems.
How much does it cost to create and run a Discord bot?
Creating a bot is completely free. Costs only appear if you want to host the bot on a paid server to keep it online 24 hours a day.
Can the same bot run on multiple Discord servers?
Yes. A single bot can be added to and operate on as many servers as you want simultaneously.
What should I do if the bot does not respond to commands?
Check that the bot is showing as online in the server, that the Privileged Gateway Intents are enabled in the Developer Portal, and that you are using the correct command prefix.
Is it safe to share my bot’s code publicly?
Yes, as long as you never include the token. Always use environment variables and add your .env file to .gitignore before sharing or publishing the code.
Can I monetize my Discord bot?
Yes. You can charge for premium features, accept donations, or offer the bot as a paid service. Just make sure to comply with Discord’s Terms of Service and Developer Policy.
How long does it take to build a working bot?
A basic bot with a handful of simple commands can be up and running in one to two hours. Complex bots with many features can take weeks or months depending on scope.
Does discord.py work with the latest version of Python?
Yes. discord.py is compatible with Python 3.8 and all newer versions. Using a recent Python release ensures you have access to the latest language features and security updates.
How do I make the bot play music in voice channels?
Music functionality requires additional libraries such as FFmpeg and yt-dlp. It is a more complex feature that requires intermediate Python knowledge and some extra configuration beyond what this guide covers.
How do I add specific permissions to my bot?
Configure permissions in the Developer Portal when generating the invite URL using the OAuth2 URL Generator. You can also adjust permissions directly in the Discord server settings after the bot has been added.